Tuesday, March 30, 2010
Even though this has nothing to do with makeup...
I can't help but post Christina Aguilera's new song Not Myself Tonight. What do you guys think? I quite like it, but I think I might have to listen to it a bit more to really love it.
Bronzer and Blush Basics

Blush Brush

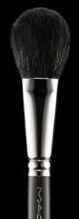
Kabuki Brush

Bronzer Brush

I use bronzer and blush on a daily basis... if I didn't I'd look even MORE pale and washed out than I do right now. No thanks. At the moment, my bronzer of choice is Clarins Bronzing Powder, and I use a MAC blush in Peachykeen. Here's my steps for achieving gorgeous, bronzed and flushed skin:
- Apply your bronzer first. You can use either a large fluffy brush to dust all over your face for a light bronzing, or you can use a more dense brush like a kabuki brush for a deeper bronze. You are supposed to apply your bronzer where the sun would naturally hit your face, so use your brush to apply to your bronzer in the shape of a 3 on your face... on your temples, your cheekbones and along your jawline. You also want to apply some to your nose.
- Take a blush brush to apply your blush to only the apples of your cheeks. A lot of people think you're supposed to apply your blush along your cheekbones... and you can, but sometimes it can look very 80s. I only apply my blush just to the apples.
- You can apply a highlighter (any shimmery, nude eyeshadow is perfect for this) to the tops of your cheekbones if you want to look extra glowy. Apply sparingly though because unless you're using a matte bronzer/blush, your skin is already gonna be pretty shimmery.
- Finally, take a clean kabuki brush again to blend your bronzer and blush together!
Uber neutral, daytime makeup


I've been kinda lazy lately and haven't been very creative with my makeup for these past few days... I've just stuck to neutral, day time looks. I've already posted a look similar to this, but I'm doing it again :). This look is all about the flushed cheeks and bright skin with a soft pink lip. Hope you like!
Monday, March 29, 2010
Christina Aguilera's new album art + makeup!


So I've always been a Christina Aguilera fan, ever since her Genie in a Bottle days and am SOO pumped that she's FINALLY releasing a new album sometime this June! BUT her first single Not Myself Tonight is being premiered tomorrow!! YAY! Anyway, I was browsing her website and stumbled across photos of the art for her new album Bionic, as well as some other photos and I just wanted to comment on her makeup of the second photo. She always rocks those red lips which I love, and what I like most is how she keeps her lips the main focus by keeping her eye makeup pretty neutral (minus those fab lashes) paired with her bleached out brows. I also love the contouring of her cheekbones, but without blush. Now it's not necessarily a look that I'd wear on a daily basis (I'm not a fan of the bleached brows), but it suits her! What do you guys think?
Sunday, March 28, 2010
Feefee's Birthday Makeup


My roommate's best buddy (who is now my friend foreva, yay!) celebrated her birthday with us over the weekend and I did her makeup for her. She has NEVER done a smokey eye before, and I was desperate to do some winged eyeshadow on her. Needless to say, she was a sexy bitch on her birthday, all thanks to me. Lolz just kidding, but you know... I gotta take some credit ;)
Oh and PS. mad credz to my lovely friend Matt who took these photos with his amazing photography skills and his amazing camera.
Lookin' good Miley


Miley Cyrus and her hot bf made their red carpet debut for their new movie the Last Song yesterday and let me just say... Miley Cyrus has been increasingly impressing me with her clothing and makeup choices. I love her dress and her makeup and hair is just gorg. She never takes risks with lip colour though which is unfortunate because I'd love to see her rock a red lip.
Stephy's Makeup


My dear friend Stephanie was the very first person I ever did makeup on. She's been a happy customer ever since (although I can't imagine why because I used to SUCK at doing makeup on other people... luckily she didn't know any better hahaha) and I often do her makeup for her on nights that she wants to look extra hot. We usually do a smokey eye because that's what she likes best and I finally got some fake lashes on her! Yesss.
Coloured Mascara... yay or nay?


For the longest time I have been wanting to experiment with coloured mascara, but wasn't sure how to wear it and how to pair it with my eye makeup. BUT, I finally bought a Quo teal coloured mascara that was on sale (40% off Quo products at Shopper's Drug Mart until April 1... you should go!!!!) and decided on an ultra smokey cat eye with the teal mascara and fake lashes. My camera really picks up the teal colour.. it was less noticeable in real life because I applied regular black mascara first, and then the teal mascara but that didn't work out too well because my mascara was uber clumpy. Not cute.
Here's some tips when using coloured mascara:
- If you don't want your lashes to be too coloured, apply black mascara first. But don't over do it like I did, because it'll come out clumpy.
- Let your coloured mascara be the focus of your makeup. Keep your eyeshadow simple, like just a smokey black eye or basic eyeliner.
- You can also apply your coloured mascara to the tips of your lashes if you don't want it to be too bold.
- More subtle coloured mascaras are also a great option if you don't want to get too crazy. My roommate Christina bought the Quo purple mascara and was unfortunately disappointed with it because it wasn't noticeable enough, but if you want a really subtle colour on your lashes to enhance the colour of your eyes then this would be perfect.
PS. The mascara that I bought is called Quo Pump Up the Volume Mascara in Teal. I was trying to find a photo of the product on the internet but no such luck... I think it's a relatively new product.
Friday's Makeup


My roomies and I had a big partay on Friday and let me just say... it was verrryyy dramatic. I drunkenly bitched out some rando guy and kicked him out of our house, making a HUGE scene... but whatevs he was a jerk and was being rude and needed to leave... ASAP. But don't worry, my makeup remained intact during all this dramz. I opted for a smokey eye but with a pop of bright purple along my lower lash line. This look would also be nice with a green or blue but purple is my fav :)
Friday, March 26, 2010
Steph's Makeup... FINALLY!


I have been desperate to do Steph's makeup for what feels like years, but every time I was supposed to, something came up and I didn't get to. LUCKILY, I finally got to do her makeup last night, and I was very very pleased. Steph doesn't really ever wear dramatic eyeliner so I knew right away that I was going to do a winged liner on her. Love it. And check out those amazing lashes!!! Those are her own, ugh so jealous.
A Cautionary Tale


My friends and I were supposed to go out to a country bar last night (big fail) and I decided to get crazy and wear my MAC Reflects glitter (big fail). The last time I wore glitter, it turned out beautifully. I had heard to use eyelash glue on your eyelid to get the glitter to stick (because otherwise it falls EVERYWHERE) and decided to do it again (because I was so successful with it last time). However, I applied the glitter first and then proceeded to use eyeshadows overtime to blend it out... big mistake. Once the glitter is stuck to the glue, it won't budge and trying to blend it out with eyeshadow only made it blotchy and patchy... not cute. My makeup turned out okay, but because I am the world's biggest perfectionist, I was not happy at all. LUCKILY you can't really tell by the pictures, which is why I've decided to post them.
Here's what I learned last night:
- Using lash glue on your eyelids isn't the best idea... if it's your only option though, do your eyeshadow and blending FIRST and then apply your glue and pat the glitter over top with a brush. It'll look nice, as long as you don't attempt to blend more eyeshadow over top.
- Do your eyeshadow and glitter FIRST, before applying ANY foundation or concealer to your skin. You're going to get glitter everywhere and it's best to do it all first, take a wipe to wipe away any glitter and then do your skin makeup.
- Use a creamy eyeshadow instead of lash glue to get your glitter to stick. NYX Jumbo Eye Pencils are a great option.
PS. The glitter that I used was MAC Reflects in Antique Gold. :)
Thursday, March 25, 2010
Future Purchase: Physician's Formula Shimmer Strips Custom Eye Enhancing Gel Cream Eyeliner


First off, the name of this damn product is WAY too unnecessarily long. I'm going to refer to it as the Physician's Formula gel eyeliner. Kay, so...
Physician's Formula has recently released a trio of gel eyeliners, all specific to your eye colour, which is fabulouso. Not too many drug store brands have come out with a gel eyeliner, but I feel like it's on the rise because gel liners are hella easy to use... people just don't know it yet. What I like about this product is that it's not just one gel eyeliner... it's THREE, in all different colours! AND they have other colours in a threesome (hehe) to compliment different coloured eyes. So, in total, you have four options: A trio for green, blue, hazel and brown eyes. OMGZ! AND the product comes with a little brush too!!!!
I have been wanting to get my paws on some crazy coloured gel liners and this seems to be the perfect product. It's cheap (around $11 USD), it's three different products in one and there's less product in each container, which is great because usually when it comes to gel liners, they dry out before you're anywhere near finishing them.
I have been wanting to get my paws on some crazy coloured gel liners and this seems to be the perfect product. It's cheap (around $11 USD), it's three different products in one and there's less product in each container, which is great because usually when it comes to gel liners, they dry out before you're anywhere near finishing them.
I don't think they're out in Canada yet (lame), but trust, as soon as they are, I'm gonna be first in line. I've been hearing that the quality is pretty good and they're completely smudge-proof. Just what I like to hear. When I purchase this, I will def blog about it... don't fret. But for now, we can all just gaze longingly at these photos and hopefully I'll get to use this product in my dreams tonight........
Star Spotlight: Gwen Stefani


I was reminiscing last night and watching old No Doubt and Gwen Stefani music videos and I came to the realization that Gwen hardly ever goes without her red lipstick and black eyeliner. It's a beautiful, classic look, but come on girl! Be daring! So I decided to hunt down some photos of her without her red lippy. Hmm... as lovely as she is with the natural makeup, I definitely like her red lipstick and eyeliner look better.

Wednesday, March 24, 2010
Look of the Day: Sea Foam Green/Blue


Decided to go for a bright blue-y green look today, in spirit of today's nice sunny weather. I wore this look to class and was at first a little hesitant because it's so hella bright, but whatevs. I'm young and this is the time for me to play around with makeup and wear crazy colours!
Tuesday, March 23, 2010
Summery orange nails! Fresh Squeezed - Nicole by OPI


I used to LOVE painting my nails, and was obsessed with it because I hated the way my nails look without nail polish. However, my love has since turned to makeup and my poor nails have suffered greatly... those poor babies are hardly ever looked after anymore. Lucky for me though, my sister has adopted my love of nail polish and buys all these sweet colours, so over the weekend I decided to paint my nails a fun, summery orange! The colour is Fresh Squeezed by Nicole (by OPI) and my sister bought hers at Shopper's Drug Mart for something like $10-$12. A word of warning though... the colour in the little container thingy (what would you call that??) looks pretty matte but when you apply it it's very very sparkly. However, that's what made me like it the most, so it def wasn't a problem for me!
Look of the Day: Smokey Brown


I've done this look before (it's my go-to look whenever I'm feeling uninspired or lazy with my makeup) but decided to post a photo again. It's very pretty but a little too boring for my liking, BUT it's a really nice smokey and sultry look that is still appropriate for daytime. Hope you like!
Monday, March 22, 2010
Look of the Day: Makeup for Glasses


My sister requested that I blog about makeup for glasses. So that is what I am writing about today. This look can obviously be worn by people who don't wear glasses, and it's very nice for a daytime look. However, I did certain things to accentuate parts of my eye so that it's more noticeable when wearing glasses. Here's the steps:
- Apply concealer to your under eye. Because wearing glasses can cast a shadow on your eyes, you want to make sure that you look bright and awake and you don't have any dark bags under your eyes. I used MAC's Moisturecover concealer.
- Prime your eyelid with an eyeshadow base, like MAC Paint Pot, Urban Decay Primer Potion, Too Faced Shadow Insurance, etc., to prevent creasing.
- Start with a nice shimmery white or gold eyeshadow in the inner corner of your eyes and take it to about halfway onto your eyelid.
- Take a matte brown eyeshadow and apply to the outer two thirds of your eyelid. Symmetry by MAC is a great option for people with fair skin (like myself).
- You want to really define your crease in order to make it look noticeable when you're wearing glasses, so take a brown eyeshadow and use a fluffy brush to blend the colour onto your crease.
- To accentuate your eyelashes, draw your eyeliner with a wing. Use a gel liner like MAC's Fluidline in Blacktrack
- Use the same eyeshadows to apply colour along your lower lash line with the darkest colours on the outer corner.
- Apply LOTS of mascara. Your eyelashes tend to disappear when you're wearing glasses, especially your top lashes so make sure they're nice and voluminous and apply a lot to your lower lashes too... these are the lashes that you'll see the most when you're wearing your glasses.
- To further accentuate your lower lashes, take that same gel eyeliner and draw a little flick along your lash line in the same direction that your lashes grow. This will make them look thicker. You could even apply some false lashes along your lower lash line, but that seems kind of unnecessary for an everyday look.
- Line your waterline with some white or nude coloured eyeliner to make your eyes look bigger and more awake.
- Finally, make sure your brows are neat, groomed and filled in. Brows not only frame your face but they also frame your glasses, so make sure they look nice!
Hope this helped for all you glasses wearers!
Sunday, March 21, 2010
Look of the Day: Spring Trend Coral


So APPARENTLY this season's big colour in makeup is coral. Personally I think you should rock the trend with a coral lip instead of coral eyes, however I don't own any kind of coral lip colour (sorry!) so I opted for some coral eyeshadow instead. This is a very pretty look although I wouldn't recommend it if you're a ginge... it'll only clash with your hair colour. However, with that said... what do I know, right? If you like it and think it looks good on you then ignore what I'm saying and rock it with confidence! That's what makeup's all about. Anyway, hope you likey!
Saturday, March 20, 2010
Look of the Day: Matte smokey eye

Hahaha totally didn't retouch all my unplucked brow hairs...


This is a pretty dramatic and dark (at least by my standards) smokey eye. I wanted to go for a matte smokey eye instead of a shimmery or frosty look and of course, I had to throw in the winged eyeshadow because I love it. OH and I decided to branch out and try out my sister's lip gloss. It's a pink nude with gold sparkles and it's verrryyy pretty. It totally adds that girly twist to such a dark eye. I will do a review on it a bit later once I've worn it for a bit longer. Anywho, hope you like!
I love Hilary Duff... and her makeup.


I've always had a secret love for Hilary Duff (back in my high school days I was OBSESSED and bought her Dignity album the day it came out AND went to her concert... best concert of my life!! Haha don't judge). This is a photo of her on March 18 at the Shipley and Halmos Event and Confederacy and I think her makeup is absolutely beautiful!! Love her eye makeup and the pink/nude lip and her flawless skin. So gorgeous!
Friday, March 19, 2010
Brush Basics
A lot of people don't realize just how important brushes are to your makeup collection. Sure, it's more fun to buy real makeup, but your brush collection really does make a difference to your makeup and its application. Now, this doesn't mean that you have to rush out and buy super expensive brushes... who can actually afford that? High quality brushes are definitely an investment that is worth the money, but a good brush collection takes a LONG time to build (because they're so expensive). I'd recommend starting out by buying cheaper brushes (Quo does some great, affordable brushes at Shopper's Drug Mart and Target in the States has some amazing Sonia Kashuk brushes) and then for every occasion like your birthday or Christmas, just treat yourself to one new brush
.
Here's 5 makeup brushes that I think are great starter brushes for every makeup junkie.

Here's 5 makeup brushes that I think are great starter brushes for every makeup junkie.
FACE

One fluffy powder brush (MAC 150) for dusting loose or pressed powder on your face.

One blush brush (MAC 116) (that can be used for both bronzer and blush)
EYES

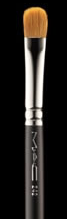
One flat eyeshadow shader brush (MAC 242) for application of eyeshadow all over your lid

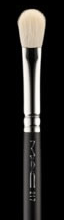
One tapered blending brush (MAC 217) for applying eyeshadow in your crease and for blending

One angled eyeliner brush (MAC 263) for applying eyeliner
Subscribe to:
Posts (Atom)
