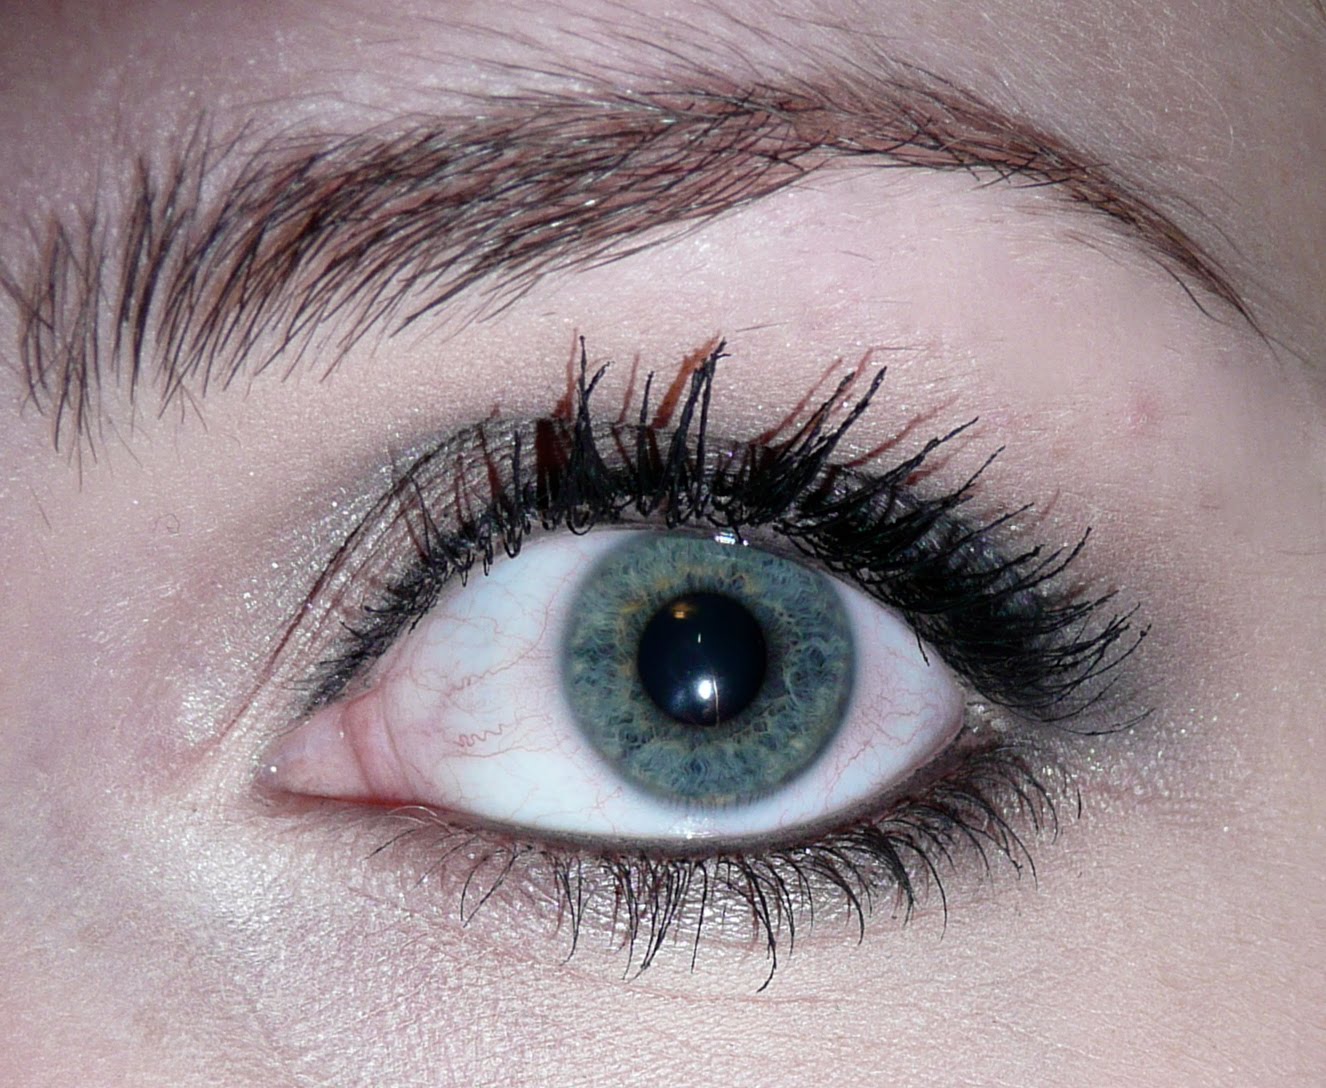


My dear friend Caroline requested that I blog about the classic smokey eye. While I loved the look I came up with, it's not my favourite eye makeup to wear just because I find it kinda boring - I like experimenting with colours and eyeshadow shapes. Howevveerrr, the smokey eye is always a foolproof choice if you're not sure how to wear your makeup with your outfit and is always sexy and sultry. Now there are a few different ways to pull off a smokey eye. I'll blog again later about the other ways to wear a smokey eye, but this is a simple smokey eye with most of the dark colour in the outer corner and crease. I used quite a few products for this look, ranging from a light tan brown to a black to a shimmery white and grey. To achieve a look like this, you want to start with your lightest eyeshadow colours first and then slowly work your way to the dark colours . Here's what I did:
- Apply PRIMERRRRRR!! This is a MUST if you're wearing dark eyeshadow colours. Urban Decay Primer Potion is definitely my first choice as a primer.
- Use a nude, skin coloured eyeshadow first just to prep your eye. You can even use your face powder and pat it over the top of your primer with a sponge.
- Use a flat eyeshadow brush to apply a matte, light brown all over your lid and above the crease.
- Start with a grey colour and apply to your entire lid, concentrating on the outer two thirds.
- Continue to build up the darkness with dark grey and black eyeshadow colours. You should never just apply a black eyeshadow right away, you do it slowly and gradually by using lighter colour eyeshadows first. This is what's gonna give your eyeshadow that nice fade from a light to dark colour.
- If you have a black eyeliner that's nice and smudgey (I used the Urban Decay 24/7 Eyeliner) you can use this to darken your look by applying it to the outer third of your lid and then using a fluffy brush to blend it out.
- Continue to darken the look in the outer corner by applying your black eyeshadow (wet or dry, but if you apply it wet it's gonna be a lot darker) until you're happy. After you apply each eyeshadow colour with a flat eyeshadow brush, take a second to blend out the edges with a fluffy brush (MAC 217 is perfect for this). Blending is keeyyy for this look.
- Take either a skin coloured eyeshadow again or your matte light brown to blend out the outer edges of your makeup with a fluffy brush.
- Finally apply a highlight colour to your brow bone and blend it downward. I'd recommend a matte white eyeshadow for this, don't use a shimmery colour, it'll just be way too much shimmer.
- Apply eyeliner (liquid, pencil or gel... for this look I used both a pencil and liquid liner)
- Do the same steps to your lower lash line. Start with a matte brown, and then gradually darken using greys and a black. Apply a shimmery (or matte, it's your choice!) white to your inner tear duct area to open your eyes. I'd recommend keeping your darkest colours on the outer third of your lower lash line... unless you're going for an UBER smokey (or emo) look, don't pull your black eyeshadow all the way to your tear duct. Not cute.
- Finally, mascara and a black eyeliner on your waterline and you're donneee!
Hope this helped!

No comments:
Post a Comment